Buy Filters Panel
This panel contains various technical indicators, that select instruments to be entered as Positions. These technical indicators are known as the “Buy Filters”. So the strategy looks into its portfolios, and determines which instruments pass the Buy Filters' criteria. For a comprehensive guide on each technical indicator provided with Portfolio Boss, read Chapter 7.
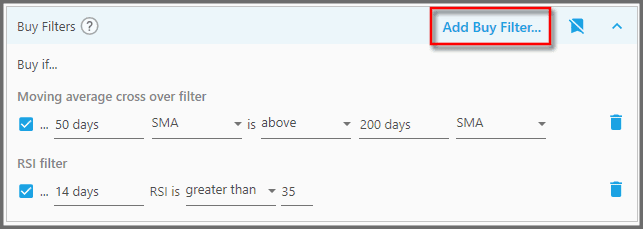
This panel is located at the Rules Area of the “Backtest Strategy” page. By default, this panel is collapsed; you can press the button shown below to expand it:

When it's collapsed, as shown above there's the info telling you the number of Buy Filters (rules) this panel contains.
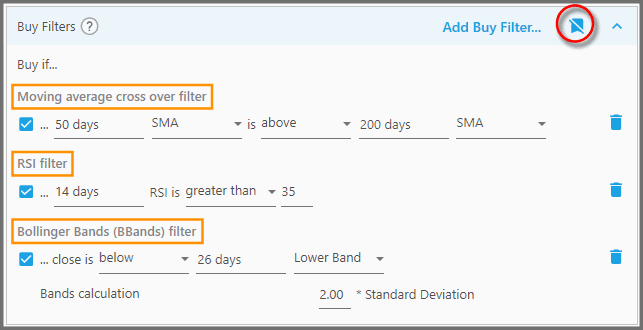
1. To add a Buy Filter (or multiple Buy Filters), click the “Add Buy Filter” button at the top-right corner.
The “Add Buy Filter” dialog shows up. Here you can search, select, and add the Buy Filter(s). Make sure you actually ticked (enabled the checkbox) of the Buy Filters before clicking “OK”.
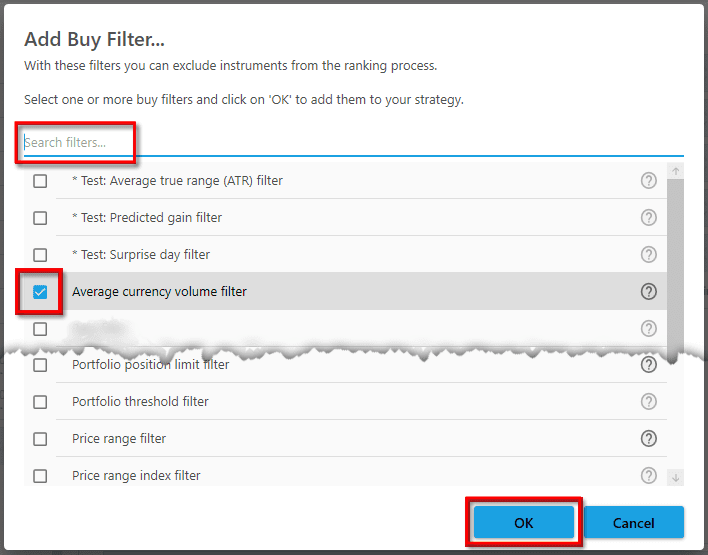
If you're merely adding one filter, you can double-click that filter without pressing the OK button (provided the filter's checkbox isn't ticked yet).
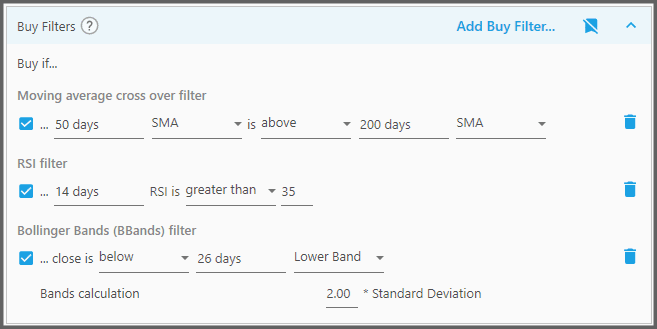
The newly added filter is always placed at the bottom of the list:
Note that certain Portfolio Boss licenses restrict you to specific filters, or filters with limited parameters. If you wish to upgrade your license, please contact our Customer Support team at support@portfolioboss.com.
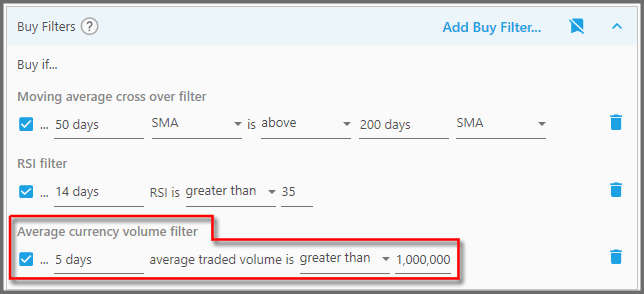
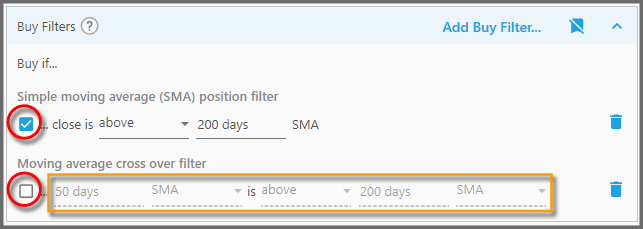
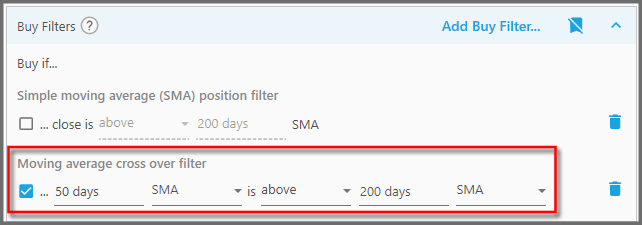
2. Some Filters can be added more than once, allowing you to stack them. Obviously, you must set their parameters different from each other.
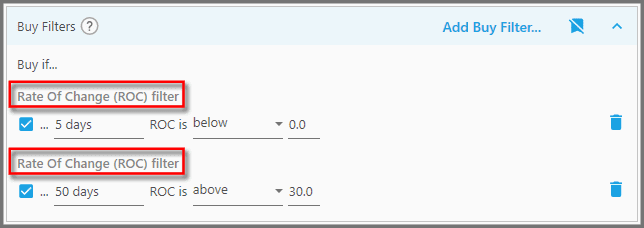
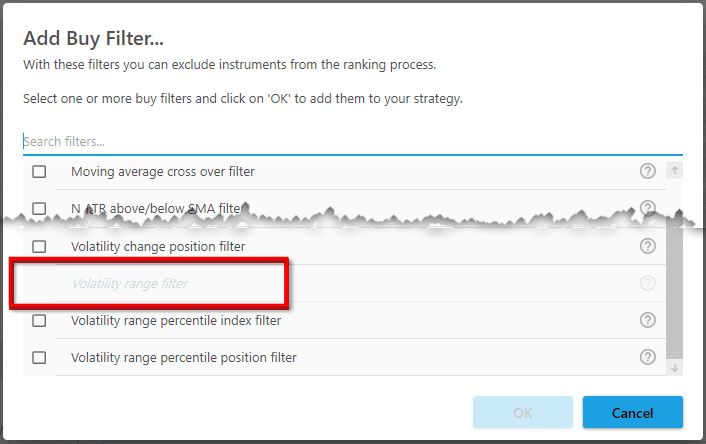
To do that, open the dialog again and add that same Filter. But note, certain Filters can only be added once; you can see this if you open the “Buy Filter” dialog and the Filter is grayed out.
3. You get the gist of how a Filter works by reading its parameters. For example, the Buy Filter called “Simple Moving Average (SMA) Position Filter”, has descriptive parameters translated into: “Buy if… the instrument closing price is above its 200 days SMA”:
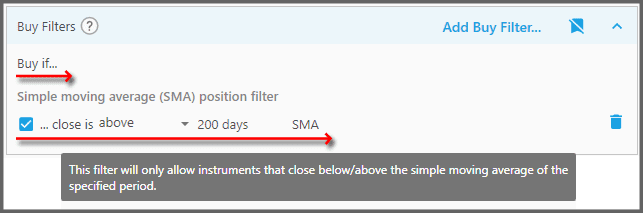
And if you hover the cursor on it, there's also a tooltip that describes the general function.
If you want to dive deep into these Filters, please refer to Chapter 7. There we discuss all Filters and Rules in great detail: their various uses, the technical indicator(s) they use, and the mechanism for each parameter. Once you understand them, you can begin tweaking and mix and match those Filters.
Keep in mind, each Filter is already given default-sensible values for quick use.
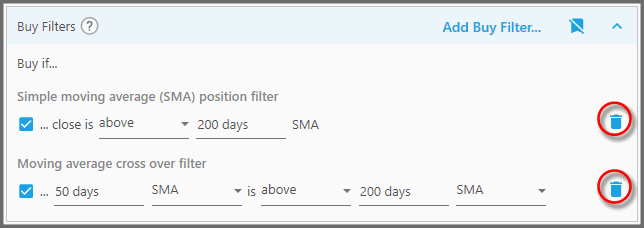
4. There's a checkbox on each Filter that you can use to enable/disable it.
A disabled Filter won't be used by the strategy, even if it's still listed on this Panel. It's useful if you're still tweaking the strategy and see which Filter may cause lower strategy performance.
Note, you can't manipulate the parameters while the Filter is disabled.
5. To delete a Filter from the list, simply click the trash-bin icon on its right.
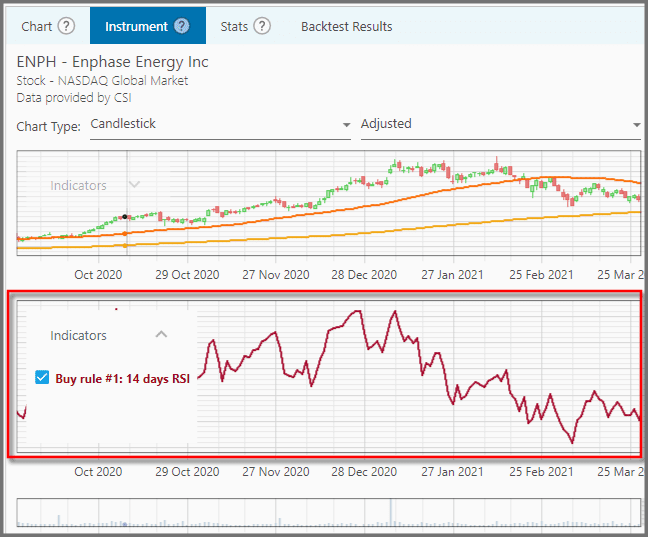
6. Most Filters have indicator graphs overlaid on the instrument's price chart (go to the Instrument Tab at the Reports Area).
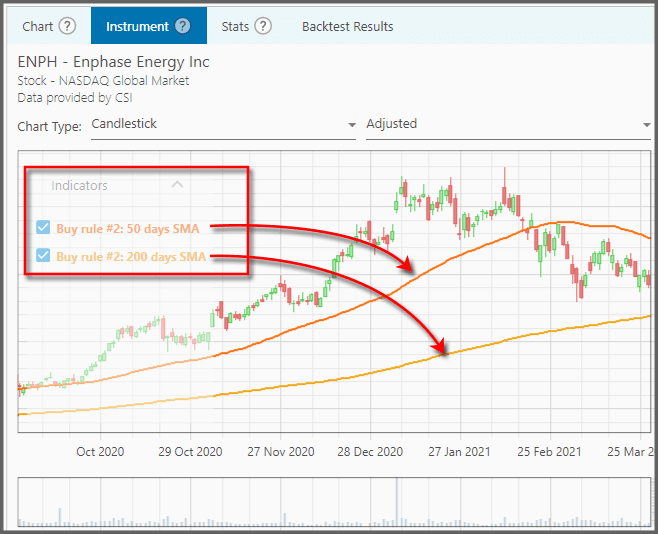
For example, the second Buy Filter from top (as listed on this panel) is labelled “Buy rule #2” and has two indicators: “50 days SMA” and “200 days SMA” plotted there. But note, this Instrument Tab is initially empty until you clicked a symbol (from the History Tab, for example).
Some indicators (those not directly related to the price) are displayed below the price chart:
Indicators will immediately change their plotting (appearance) as soon as you change the Filters' values; no need to backtest the strategy again.
Notes:
- To be eligible as a Position, an instrument must pass the criteria of all Filters listed here. The idea is that entering Positions must be difficult; various conditions must be fulfilled, since it'll be your hard earned money put on the line. The order in which these Filters are listed (top-bottom, bottom-up) does not matter. But too many Filters can be a bad thing, as you don't tolerate the necessary risks for profit. Besides, too many Filters may cause conflict between the various technical indicators.
- Keep in mind that the various Buy Filters in your strategy must be able to cope with a long period of backtest range, in various market conditions. It's a mistake to fine tune the Buy Filters so the strategy performs well at a specific, short term period.
- You can show/hide the Filters' header (name) by clicking the button shown below:
Discount Applied Successfully!
Your savings have been added to the cart.
Report
Block Member?
Please confirm you want to block this member.
You will no longer be able to:
- See blocked member's posts
- Mention this member in posts
- Invite this member to groups
- Message this member
- Add this member as a connection
Please note: This action will also remove this member from your connections and send a report to the site admin. Please allow a few minutes for this process to complete.
Report